Games

Diablo 3 Sucks and Here’s Why

Diablo 3 is likely game that needs no introduction to you gamers out there, but for those of you that may have been off world for the last six months, Diablo 3 is an action-oriented role-playing “hack and slash” game by Blizzard Entertainment, released in North America on May 15, 2012 and selling ~3.5 million units in its first 24 hours. After a playing ~100 hours of Diablo 3 with a Barbarian class character I think I’ve come to grips with how I feel about this game – and it ain’t good.

    “Insanity is doing the same thing over and over again but expecting different results.” — Rita Mae Brown

“Why can’t I complete this game?” I asked myself repeatedly as as my progress, along with my enjoyment, came to a sudden halt in Act III of the game’s infamous “Inferno” level. I clearly had all the game mechanics down pat by this stage of the game, deftly dealing pain and suffering to the “minions of hell” over the previous 12 levels. Different skills needed perhaps? Well, the game is unquestionably flawed in this respect, insisting that the further you progress in the game the narrower your skill selections must necessarily lean towards the defensive in order to survive, particularly if you’re playing as the Barbarian class. But okay Blizzard, I get it, this is war and sacrifices have to be made, right?

Ah then, perhaps my gear is inferior in some way? Yes, yes, clearly time to upgrade. Oh wait, damn, I’m out of gold. I must have spent it all repairing my equipment after all of those untimely deaths. Let’s see, what are my options? I could replay some of the earlier acts of the game for several hours and hope I have enough gold to start upgrading my gear, or I could do what any self-righteous gamer would do when confronted with a first-world problem as vexing as this: slink off to Blizzard to spend real money to buy more in-game gold.

There we are, all decked out in my new armor and weaponry. Success! Wait… no, still dying. “Of course! Better gems to buff my…”

Then it dawned on me. Blizzard has no intention of letting me finish this game. Rather, their goal for me is quite simple really – to spend money in their “Auction House.”

    “Fool me once, shame on you. Fool me twice, shame on me.” — Anonymous

The signs were all there. Equipment and gem crafting that requires you to “train” the relevant artisan by paying them not only an escalating (and princely) sum of gold for each level of better training, but also to furnishing the artisan with “Pages of Training” and “Tomes” (think recipes) in order to craft the higher level weapons, armor and gems. Alas though, these items seldom dropped as loot for me.

All of this effort might be made more tolerable if you actually knew what you were crafting in advance, but Blizzard hides weapon and armor attributes behind obscure terms like “+2 Random Magic Properties” so you don’t know what you’ll actually end up with until you’ve spent the money and resources to craft it. Imagine trying to purchase a pair of pants online when the only description of it is “Two Randomly Placed Buttons?”

Like to remove those gems that buff your armor or weapons and replace them with better ones? Sorry, just removing them will cost you 10k gold. Fancy expanding your stash storage with 14 extra slots? Sure, 100k gold please. Out doing some dungeon crawling and decide you’d like to change your current skill set to do something about the baddies that are clobbering you, well, okay, but suffer the loss of your “Nephalem Valor” buff; you know, that really cool one that gives you a boost to gold and magic find, and increases the number of drops from bosses. And your reward for getting your ass repeatedly kicked by bosses that are frankly way tougher that they should be? Drag that sorry ass back to town and spend in excess of 25k gold to repair your equipment.

    “Experience is one thing you can’t get for nothing.” — Oscar Wilde

The bottom line is this: Blizzard designed the game in way that leaves the gamer little choice but to return again and again to them to purchase in-game gold so that you can waste countless hours (and even more money) in their Auction House trying to achieve a goal that will always be just out of reach – completion of the game in Inferno level.

“Why all the complaining iceflatline. You played for over 100 hours and had fun didn’t you?” The truth is I did. 95% of the game I spent in coop mode playing with my Son, and we had a blast.

I’m complaining because Blizzard has created what amounts to nothing more than a an online store with a game wrapped around it. And it saddens me a little and worries me a lot to think that this is where game development might be heading. Call me naive but I still think game design should focus on providing the best possible experience for the gamer. In this case that’s an even shot at completing the game at its highest difficulty level for the price for it.

Don’t get me wrong, I don’t think good game development and incremental revenue via micro-transactions are mutually exclusive goals. But when games are deliberately designed to remove choice and present insurmountable challenges for the sole purpose of generating more revenue, well then we gamers have been scammed. And the game industry, and more importantly, the gamer will suffer as a result.

Blizzard has every right to design their games in anyway they chose. And gamers have a every right not to buy it. I can confidently say that I will exercise that right the fullest extent possible when it comes to future Blizzard games.
News

Mint Analytics Added

Friends, a quick post to let you know that I’ve added Mint to the site. What’s Mint? It’s a self-hosted web site analytics program. I was interested obtaining more information about who is referrering readers to the site, popular pages, top searches, etc, but found the tools offered by my web host bluehost lacking. Here’s a list of the datapoints the Mint program is collecting for me here at www.iceflatline.com:

  • Visits (past-day, -week, -month, and uniques)
  • Referrers (newest unique, most recent, repeats, and domains)
  • Pages (most popular, most recent, entry, watched)
  • User Agent (browsers, platform, screen, flash)
  • Searches (most common, most recent, found)
  • The data Mint collects is anonymous; the program does not collect personal data of any kind. My motivation in using Mint is purely technical – better metrics.

    Anyway, if you have any questions, comments, or concerns about Mint, or this site’s use of Mint, please leave a comment.

    News

    Atom Syndication Feeds Added

    From the department of “I should have done this a long time ago,” I have added Atom syndication feeds to www.iceflatline.com. Now in addition to RSS you can use Atom to track posts and comments using the URLs https://iceflatline.com/feed/atom/ and https://iceflatline.com/comments/feed/atom/ respectively. These links have also been added to the “Meta” section to the right.

    Live long and Atom.

    BSD

    How to use Clonezilla to Create and Backup Disk Images to FreeNAS

    FreeNAS is an open source storage platform based on FreeBSD that supports file sharing across Windows, Apple, and Unix/Linux systems. Clonezilla is an open source clone utility for doing bare-metal backup and recovery for disks and disk partitions.

    In this post I will describe how to use Clonezilla to create image files of disks or disk partitions and backup those images in real time over a network to a machine running FreeNAS. All steps involved assume you have a running implementation of FreeNAS. The software versions used in this post were as follows:

    • Clonezilla v1.2.12-10
    • FreeNAS v0.7.1 Shere (revision 5127)

    Configure FreeNAS

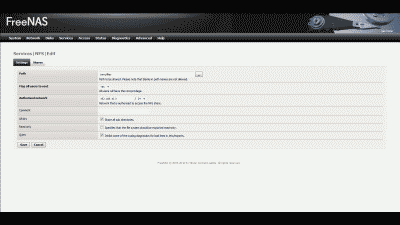
    Let’s start by making a new directory in FreeNAS to hold the images we create using Clonezilla. For the purpose of example, let’s assume there is an existing mount point located at /mnt/files and create a new subdirectory called images at that location. Next, let’s enable Network File System (“NFS”) service in FreeNAS so that /mnt/files/images can be accessed from Clonezilla. Login into the FreeNAS web interface and navigate to Services -> NFS -> Settings and make sure that the check box for enabling NFS is checked then specify the number of servers that will run (Hint: the default value of four should easily handle dozens of users). Now select “Save and Restart.” Next, navigate to Services -> NFS -> Shares and select the “+” icon, where you are presented with the configuration screen for creating a new NFS share. Enter the path to be shared; the network that is authorized to access /mnt/files/images; and, make sure that the “All dirs” and “Quiet” check boxes are selected. The remaining options can remain at their defaults (See Figure 1). Then select “Add” then “Apply changes” (Note: If you would prefer to use Common Internet File System (“CIFS”) instead of NFS, navigate to Services -> CIFS/SMB and select the appropriate settings and add your network share).

    Screenshot of NFS shared path configuration in FreeNAS

    Figure 1

    Using Clonezilla
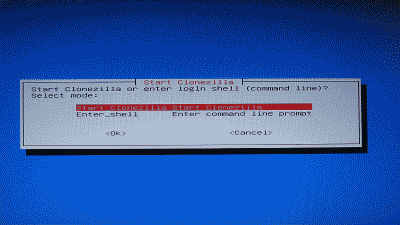
    Now it’s time to use Clonezilla. Download a copy of Clonezilla live and burn it to a CD (or place it on a bootable USB drive). Boot the system using the Clonezilla live disk, where you’ll be given the option to change the language and select an alternative keyboard keymap, eventually arriving at the “Start Clonezilla” Screen (See Figure 2).

    Screenshot of Clonezilla's start screen

    Figure 2

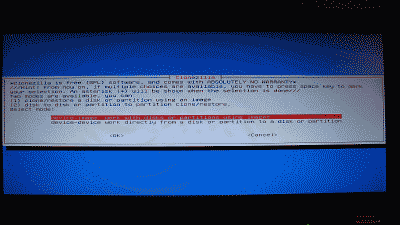
    Highlight “Start Clonezilla” and select “Ok.” The screen that follows provides a choice of cloning/restoring a disk or disk partition using using an image, or cloning/restoring a disk or disk partition directly to another disk or disk partition. Since we’ll be creating an image of a disk, we should select “device-image work with disks or partitions using images” (See Figure 3).

    Screenshot of Clonezilla menu option to work with with images or devices when cloning or restoring

    Figure 3

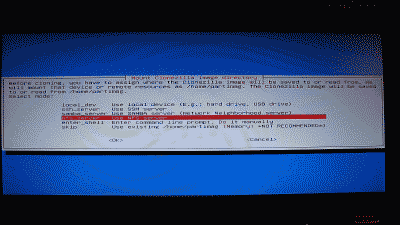
    Next, Clonezilla will ask us to define where the image will be saved to (or read from), providing you with several options for accomplishing this task. We’re interested in using an NFS server, so select “nfs_server Use NFS server” (See Figure 4).

    Screenshot of Clonezilla options specifying where it should transfer images to/from

    Figure 4

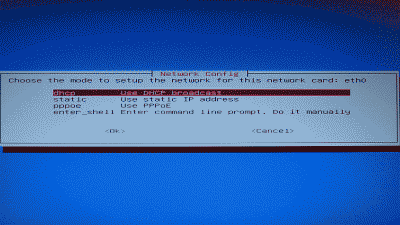
    You’ll then be offered several choices on how Clonezilla should obtain IP network settings, including DHCP, static IP, PPPoE, or a shell prompt to manually define how it should go about doing obtain its settings. Select which option works best for you then select “Ok” (See Figure 5).

    Screenshot of Clonezilla IP network configuration options

    Figure 5

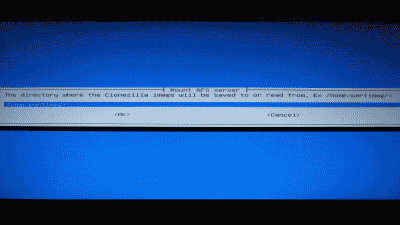
    Clonezilla will then ask you whether it should use NFS version 2,3 or 4. Select “nfs NFS V2, V3,” then enter the IP address or the host name of your FreeNAS machine in the screen that follows. Next, you’re asked where the Clonezilla image will be saved to/read from. For the purpose of our example, we’ll enter “/mnt/files/images” to match the new directory we created earlier (See Figure 6).

    Screenshot of Clonezilla option specifying where the image should be stored

    Figure 6

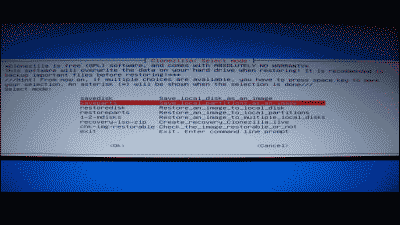
    Clonezilla will then mount /mnt/files/images and display its current disk usage. Select “Enter” to continue and you’ll be given a choice to use Clonezilla in either a beginner or expert mode. Select “Beginner mode: Accept the default options” and you’ll be presented with a choice of whether to create images of the entire disk and/or one or more partitions (Note: this screen is also where you would choose to restore disk or partition images). If you would prefer to create an image of a partition, select “saveparts Save_local_partitions_as_an_image” where you will be presented with a choice of which partition(s) to create images of. For the purpose our example, however, we’ll select “savedisk Save_local_disk_as_an_image” to create an image of the entire disk (See Figure 7).

    Screenshot of Clonezilla options allowing user to specify whether to create or restore the images of disks or disk partitions

    Figure 7

    Next, we’ll enter a name for new image and then chose whether we want to check and repair the file system before Clonezilla creates the image. This option is only for supported for certain Linux files systems, like ext3/4, and not for NTFS, so unless you have one of the supported file systems and have reason to suspect the file system may be in error, you should simply select “Skip checking/repairing source file system.” Clonezilla will then ask if you’d like for it to check if the image it creates will be restorable. Don’t worry, it performs this test without actually writing any data to the drive, so let’s select “Yes, check the saved image.” Now select “Enter” to continue, and confirm that you’d like Clonezilla to create the image by entering “y” at the prompt. Clonezilla will then create the disk image and write it to /mnt/files/images on your FreeNAS machine. When complete, Clonezilla will test to make sure the image is indeed restorable and then give the option of powering off the machine, rebooting, using the command line or start over. Congratulations! You’ve just created an image of your disk and stored it on your FreeNAS machine, where it will live safely and happily until you need it.

    Games

    A Quick Review of The Elder Scrolls V: Skyrim for PC

    bought the Steam version of Bethesda’s The Elder Scrolls V: Skyrim and played as a female Nord warrior named Amenia. I spent over 275 hours in Skyrim and finished my experience at level 52. I used a series of custom made warhammers throughout the campaign, and my traveling NPC companion was Lydia, another Nord warrior. Here’s a few quick thoughts on the game.

    Pros…

    The Look – With Skyrim, Bethesda’s introduces us to its new “Creation” engine. I played the game on a Intel Core i7 2600K CPU and MSI Radeon 6950 GPU with all settings at max and it looked absolutely fantastic – far better than than the Fallout 3 series based on their previous Gamebryo engine.

    The Expanse – Sweeping vistas, spacious skys…, whatever. This game is big, crazy big. Wandering through its vastness reminded me each time I departed Whiterun, my “base camp” for most of the campaign, just how open this game feels and how insignificant I was. It’s really the world of Skyrim itself that’s the star of the show.

    The Quests – Skyrim offers hundreds of quests, generally sorted by where they are assigned or by which faction assigns them. The Daedric quests were among my favorites, and just evil enough to make me reach for my moral compass each time I did one.

    The Combat – The first-person combat has significantly improved over the Oblivion and the Fallout 3 series. Mechanics of swinging melee weapons was noticeably better; movement much more fluid.

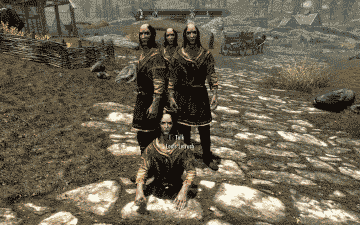
    Screenshot of a Skyrim glitch showing multiple versions of the same NPC

    Is anyone missing a Louis Letrush from their game of Skyrim? I seem to have 2.5 too many.

    Cons…

    The Draugr – Perhaps one knock on Skyrim is the limited variety of enemies in the various “dungeons.” Take the Draugr for example, undead Nordic warriors who were once residents of Skyrim. You couldn’t sling a dead…well, Draugr without another hitting one. They seemed to be present in every cave and cranny I entered. While the Draugr Lords were challenging, particularly in numbers, the rank and file ones were little more than hammer fodder.

    The Dragons – Um, yeah, about those guys. Perhaps my years of playing D&D tainted my view of these mystical creatures, but at least there you knew you were going to have your hands full when you met one. In Skyrim? They go down like chumps. Very disappointing.

    The Decision – Nord or Imperial? In truth, I’m not sure why Bethesda created this quest line. It had no bearing on the main quest and no matter which side you chose, was immaterial to the outcome of the game, or with your interaction with the locals. Again, disappointing.

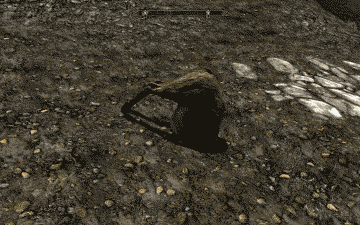
    Screenshot of a Skyrim glitch showing a deer half burried in the terrain

    Animals have it tough in Skyrim. Is it any wonder then that some would prefer to simply bury their heads in despair?

    Tips…

    Ever use a bellow? – Sure you can buy your weapons, and maybe you’ll happen upon a nice one, but the best ones are those you create and enchant yourself. I recommend pumping skill points into Smithing and Enchanting early and often.