Category: Linux

The Linux category contains posts relating to installing and configuring applications, services and processes on Linux-based systems.

Linux

My Conky Configuration

One of my favorite things about using Linux and BSD is Conky. Conky is a free, light-weight system monitor that can display nearly any information about your system directly on your desktop. Originally a fork of Torsmo, Conky’s torsmo-based code is BSD licensed. New code in Conky has been licensed under the GPL 3.0.

Installation is easy. On a Debian-based distribution like Ubuntu:

On Fedora-based distributions:

And on BSD, if you’ve installed the Ports collection:

Or if you would prefer to add the package:

Conky is very simple to configure. Using a pre-defined set of variables in a configuration file you define what Conky should monitor and where those monitored parameters are displayed on your desktop. The look and feel of what’s displayed is highly customizable.

On most systems the default configuration file location is /etc/conky/. There you will find the sample configuration file conky.conf. You’ll want to copy it to ~/.conkyrc and then start modifying it.

When setting up my Conky configuration, I decided to dispense with the fancy network graphs and other eye candy that I’ve seen in so many others use and go with a more utilitarian approach. I settled on four areas for Conky to monitor:

  • System – basic system information showing kernel version, uptime, total RAM and Swap usage, etc.
  • Processor – shows the top five applications or processes based on CPU usage
  • Memory – shows the top five applications or process based on system RAM usage
  • Network – shows basic information regarding wired and wireless connections, including IP address, inbound and outbound speed, connection quality, etc.

This minimalistic approach looks good (less “cluttered”) in my humble opinion, and provides just the information I need while not straining system resources.

One of the many cool things about Conky is its support for the use of conditional statements within its configuration file. The ${if_existing} variable, as an example, checks for the existence of a file passed to it as an argument and will display everything between ${if_existing} and the matching ${endif}. I used this particular variable to my advantage when configuring the network monitoring section. Instead of displaying information about each wired and wireless interface, even when they weren’t up, I chose instead to display information about them only if they were up by using the existence of a particular interface (e.g., eth0) in /proc/net/route.

Anyhoo, here’s the configuration file I’m currently using. Feel free use it as is or change it to fit your needs and taste. Post your Conky configuration in the comment section.

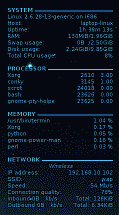
And here are some screenshots:

 Screenshot of Conky running on my Crunchbang linux desktop

Figure 1

 Screenshot of Conky running on my Crunchbang linux desktop

Figure 2
Linux

How to Install Apache, MySQL and PHP on CrunchBox Linux

So, you’re a CrunchBang Linux user but you want to get a little web development work done? This post will describe how to install and configure Apache, MySQL, and PHP on your box. Once set up, you’ll be able to use your LAMP server to do basic web development and code testing, maintain local copies of your web sites, etc.

The software discussed in this post are free and open source. Apache is licensed under the terms of the Apache License, a free-software license authored by the Apache Software Foundation. MySQL is available under the terms of the GNU GPL. PHP is distributed under the PHP license v3.01, an open source, BSD-style license certified by the Open Source Initiative. The remaining software, phpMyAdmin and WordPress, are not required, however, they are available under the terms of the GNU GPL. The versions for the software discussed in this post are as follows:

  • Apache v2.2.11-2ubuntu2
  • MySQL v5.1.30really5.0.75-0ubuntu10
  • PHP v5.2.6.dfsg.1-3ubuntu4
  • phpMyAdmin v4:3.1.2-1
  • WordPress v2.8.5

Let’s get started.

Install Apache

Let’s grab the latest version of the Apache HTTP server:

Once successfully installed, the Apache server will start automatically. You may notice Apache complaining with “Could not reliably determine the server’s fully qualified domain name, using 127.0.1.1 for ServerName.” No worries, it simply means that Apache could not find a qualified domain name like foo.com in its configuration file. Let’s prevent this message from popping up though by binding the server name to the localhost IP address. Open /etc/apache2/apache2.conf as root and append the following line to the end of the file:

Now restart the Apache server with the following command:

Let’s also make sure now that the server is working. Open a web browser and enter http://localhost. You should see Apache’s time tested “It Works!” message.

Install MySQL.

Now that the Apache HTTP server is up and running, let’s download and install the MySQL server:

During the installation you’ll be asked several times to enter a password. You can leave it blank, but for obvious security reasons and to avoid configuration problems later, I would strongly suggest entering a password. Like Apache, once the MySQL server is installed, it will will start automatically. Now, let’s make sure the server is bound to the local host IP address like we did with Apache. Open /etc/mysql/my.cnf as root and make sure the following line exists. If not, simply append it to the end of the file:

Now restart the MySQL server with the following command:

Install PHP

Almost there. Let’s download and install PHP:

Brilliant. Now let’s test to make sure PHP was installed correctly. Navigate to /var/www/ (Apache’s web root folder) and create the following file:

Open that file as root and enter the following PHP function:

[php light=”true”]

[/php]

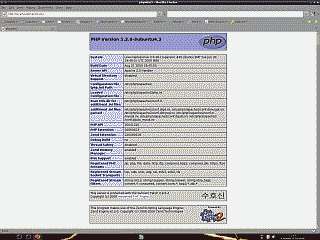
Open your web browser and enter http://localhost/phpinfo.php. You should see a page providing some information regarding your PHP installation (See Figure 1).

Screenshot of the of the phpinfo function output

Figure 1

A completely optional but handy package to have for administering your MySQL server is phpMyAdmin. This package gives you the ability to create, copy, rename, alter and drop databases and tables using a web interface instead of the terminal. To install phpMyAdmin:

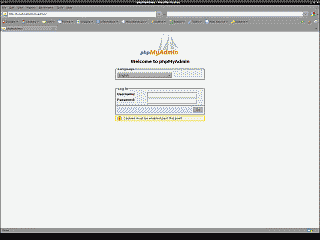
During the installation you’ll be asked to chose the web server that should be automatically configured to run phpMyAdmin. You’ll want to chose Apache2. PhpMyAdmin will also indicate that it needs to have a database installed and configured before it can be used, and offer to set up a temporary configuration for you using db-config. Since we already have our MySQL server up and running we should choose No here. Once the install finishes, open your web browser and enter http://localhost/phpmyadmin. You should see the logon page for phpMyAdmin (See Figure 2).

Screenshot of the phpMyAdmin logon page

Figure 2

That’s it for the installation. Now let’s move on make sure everything works together.

Testing our LAMP installation using WordPress

WordPress is a full-featured blogging tool (This web site was built using WordPress. The author is not full-featured) that makes heavy use of Apache, MySQL and PHP. We’ll install it on our LAMP server to ensure we have these packages installed correctly. Let’s start by downloading WordPress directly from the developers site. You can also download and install using Aptitude but I don’t recommend it as the repository’s release is a version or two behind the most current release. Navigate to your home directory (or wherever you’d prefer to download the package to) and download and untar the package:

Let’s move the extracted wordpress/ directory to Apache’s web root folder:

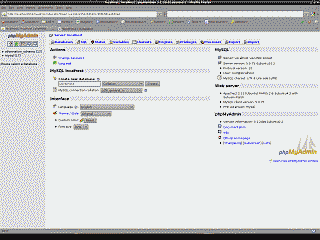
Now let’s create an MySQL database for our WordPress installation. Open phpMyAdmin in your browser. Enter root for the Username and the password you set during the MySQL installation (or simply leave this field blank if you skipped entering a password). To create a database, enter a name for it in the Create a new database field. For purposes of our example, let’s use wordpress as the name. Now select Create (See Figure 3).

Screenshot of a database being created through phpMyAdmin

Figure 3

Now we need to do a little pre-configuration on one of the wordpress files in preparation for installation. First, navigate to /var/www/wordpress/. As root, copy the file wp-config-sample.php to wp-config.php. Open the latter file and enter the database name as well as your MySQL login and password. If you chose not to create a password when you installed the MySQL server, make sure to leave two single quotes with nothing in between in DB_PASSWORD. When complete, it should look like the following:

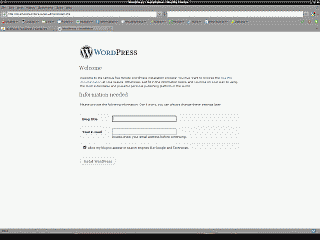
Now let’s install WordPress. Open your web browser and navigate to http://localhost/wordpress/wp-config.php. If everything is configured as it should be you will be greeted with WordPress’s installation wizard (See Figure 4).

Screenshot of the wordpress install wizard

Figure 4

Final thoughts

One issue you may encounter is phpMyAdmin complaining that it can’t load the MySQL extension. More than likely the problem in this case is that phpMyAdmin wants the MySQL PHP module loaded automatically when Apache starts (it isn’t by default). To fix this, open /etc/php5/apache2/php.ini and uncomment following line extension=mysl.so. Save the file and restart Apache.

Finally, you may not want your LAMP server running continuously but rather only when needed. There’s a couple of ways to keep Apache and MySQL from running at boot time. First, you could simply remove their corresponding entries from /etc/rc2.d. A more elegant way to manage these daemons, however, is to download and install sysv-rc-conf.

sysv-rc-conf provides an easy to use interface for managing rc.d symlinks. The interface comes in two different flavors, one that simply allows turning services on or off and another that allows for more fine tuned management of the symlinks. To use it just enter sysv-rc-conf on a command line as root.

When you want to use your LAMP server again you’ll need to start Apache and MySQL from the command line:

Well, that’s it. With a couple of open source packages and a few minutes of your time you can a get a fully configured web server up and running on your CrunchBang Linux box.

References

http://httpd.apache.org/
http://dev.mysql.com/doc/refman/5.1/en/
http://php.net/index.php
http://www.phpmyadmin.net/home_page/index.php
http://wordpress.org/

Linux

How to Install VirtualBox Linux Guest Additions

(20140911 — The steps in this post were amended to address changes in recent versions of software. Minor editorial corrections were also made — iceflatline)

This post will describe how to install VirtualBox Guest Additions on your Linux guest operating system.

Oracle’s VirtualBox is a general-purpose x86 machine virtualizer that runs on Windows, Linux/Unix, and OpenSolaris hosts. It supports a large number of guest operating systems, including Linux (kernel versions 2.4 and 2.6) and the usual Windows flavors. Guest Additions consist of drivers and kernel modules that improve the usability and performance of the guest operating system, including the ability to share the mouse pointer seamlessly between the guest and host systems without the need to free the pointer from the guest OS first; the ability to share the clipboard between the guest and host OS; and, better video support through the use of guest drivers for the X Window system that provide higher (and non-standard) video modes as well as accelerated video. VirtualBox and its Guest Additions addon are free software licensed under the GNU GPL.

The versions for the software discussed in this post were as follows:

  • CrunchBang Linux v11
  • VirtualBox v4.3.14
  • Windows 7 Pro

So, let’s get started.

Download and Mount

VirtualBox Guest Additions are designed to be installed to the guest OS after it has been installed. So, if you haven’t already installed your Linux guest OS make sure you do that first.

VirtualBox Guest Additions is provided as a single image. To install, you mount this image as your guest OS’s virtual CD/DVD-ROM drive and install it directly from the drive from within the guest OS. Start your guest OS and release your mouse pointer. Navigate up to the top of the window and select Devices->Install Guest Additions CD Image. The image should automatically mount as your guest OS’s virtual CD/DVD-ROM drive. (you may see a disk icon of some sort on your guest OS desktop). Now, let’s install the Guest Additions. Open up a terminal and navigate to the directory where your virtual CD/DVD-ROM is mounted (e.g.,/media/cdrom0). List the contents of the directory and you’ll notice several scripts. You’ll want to run the Linux script from this directory with the following command:

The script will do a self-check to verify the integrity of the image, then it will proceed with uncompressing files, building new kernel modules, and installing drivers. After the script finishes, you should reboot your guest OS to ensure that Guest Additions is actually used.

Troubleshooting

One problem I’ve encountered is that the installation will fail, complaining that headers for the current kernel were not found. To fix this problem make sure to first update your packages, then install the necessary kernel headers. For example, in CrunchBang, Ubuntu, and other Debian-based distributions, run the following commands:

Conclusion

I’m starting to use VirtualBox a lot now to help test and evaluate various BSD and Linux distributions in a more flexible way. Guest Additions is easy to set up and makes working in your guest OS a much better experience.

Linux

Configure Command Line Aliases in Bash

(11.24.09 – This post was edited to expand the discussion on the various files read by Bash for login and sub-shells — iceflatline)

This post will describe how to set up command line aliases in Free Software Foundation’s “Bourne Again Shell” (BASH) for reducing common input mistakes and improving efficiency at the terminal.

Let’s take the simple case of a command like ls –a, which prints a list of the current directory’s files, including the hidden ones. Let’s change that command to something perhaps more efficient:

Nice. Now we need only to type lsa to get the same results. Not enough of an improvement over simply typing ls –a? Let’s take another example. Say we use something like the following command to routinely download a specific directory from a web site: wget -nH -r -l inf ftp://ftp.somewebsite.com/directory1/directory2/. Sure we could try to remember a string like this each time we need it and debug if mistakes are made, but let’s make it easier:

You get the idea; I’m sure you can think of other examples. The point here is that each of these aliases will start to add up after awhile to help save you time and reduce mistakes.

Now, let’s say we open up a terminal and enter a few aliases like ones above. What happens when we close and reopen the terminal? Unfortunately aliases entered like this won’t carry over to the next bash shell session. To accomplish that we need to set up something more permanent.

There are three files in your home directory that hold a special meaning to Bash, allowing you to set up your environment automatically when you log in, when you start another Bash shell, and when you log out. These files may or may not exist depending on the Linux distribution you’re using. If they’re missing, Bash defaults to /etc/profile. These files are:

  • .bash_profile: read by Bash when you log into the system
  • .bashrc: read by Bash when you start a sub-shell
  • .bash_logout: read by Bash when a login shell exits
  • Bash allows two replacements for .bash_profile: .bash_login and .profile. However, only one of these files is read when you log in. If .bash_profile isn’t there, Bash will look for .bash_login. If that file is missing, it will look for .profile. If you start a sub-shell (e,g, a new terminal or X windows), Bash will read commands from .bashrc. Most users, however, want to have the same commands run regardless of whether it is a login shell or a sub-shell. This is typically done by including a small script (similar to the one for .myaliases below) or the line source .bashrc within .bash_profile to execute .bashrc. All the commands, including aliases, are then placed in .bashrc.

    Using a text editor you can add your own aliases directly to .bashrc or, in some cases, simply uncomment ones that the distribution may have added for you (Ubuntu for example does this). Another approach is to create your own file containing your aliases and then simply point to that file from within .bashrc. This might be handy if you want to easily carry your aliases from one system to another. To do this, first create the file:

    Now, open the file in your favorite editor and enter your aliases and save it. Here’s a list of the ones I often use:

    Now, open .bashrc and add or uncomment the following script, making sure to modify the file name to match the file you created for your aliases; then save the file.

    Now reboot the system or simply issue the following command to have bash recognize the aliases:

    That’s it. Your new aliases should be ready to go. You can get a list of your aliases at anytime using the command alias without any arguments, and you can temporarily “unalias” any alias you’ve set up with the command unalias aliasname. However, this will only last for as long as the shell session does. To permanently eliminate the alias you’ll need to delete it from your alias file.

    But what if we want to have these aliases available when we log in or run a session as root, or another user? To do that we need to add our list of aliases to a file that is accessible to bash on a system-wide bases. In the case of a Fedora or a Fedora-based distribution, that file is most likely going to be /etc/bashrc, and the case of Ubuntu or other debian based distribution that file is likely to be /etc/bash.bashrc. Place your aliases at the end of those files and restart the system or use the command exec bash and they will be available regardless of which user you are.

    References

    Newham, C., and Bill Rosenblatt. Learning the bash Shell. 2nd ed. Sebastopol, CA, USA: O’Reilly, 1998. Print.

    Linux

    Set up a Super Key on an IBM Laptop for use in CrunchBang Linux

    I recently started using CrunchBang linux on my IBM T43 laptop. I really like CrunchBang and highly recommend it for those looking for a minimalistic , lightweight alternative to Ubuntu, especially on older machines. However, by default, it, or more accurately, its window manager Openbox, makes heavy use of the keyboard “Super” key (also called the “Windows” key) to open many of the most used applications. For example, Super+t opens the default terminal emulator, Super+w opens the default browser, etc. Now normally this would not be a problem, unless of course you own an IBM T43 laptop, in which case you have no windows key. Sure I could go through the hassle of changing all those key assignment in Openbox to something else, say Alt+w, but then both Alt keys would be dedicated to the task. I also wanted to mimic the same key behavior I currently use in Windows. In Windows I assigned my right Alt key as the “Windows” key. Here’s what worked for me in CrunchBox.

    First I created the file .Xmodmap so I could add my own key map changes. The standard location for .Xmodmap is your home directory and it (and any key map changes contained therein) should load automatically at start up.

    Then I opened the file and added the following lines:

    Rebooted and now have a working right Alt key acting as the Super key.

    References:

    http://cweiske.de/howto/xmodmap/allinone.html