(20120629- This post has been amended to address changes in current versions of CrunchBang and GParted — iceflatline)
This post will describe how I installed and configured CrunchBang Linux for use on a Lenovo ThinkPad T410, the challenges that I encountered, and how those challenges were overcome.
CrunchBang is a Debian-based distribution featuring the light-weight Openbox window manager. The distribution is essentially a minimalistic Debian system customized to offer a good balance between speed and functionality. The Lenovo ThinkPad T410 that I purchased has the following specifications:
- Windows 7 Professional (x64)
- Intel Core i7-620M processor (2.66 GHz)
- Elpida RAM 4MB (1066 MHz)
- Seagate 300GB HDD (7200 RPM)
- Intel 82577LM Gigabit Ethernet adapter
- 11b/g/n wireless LAN Mini-PCI Express Adapter II
- NVIDIA NVS 3100m Graphics Adapter
For those of you who may still be contemplating your purchase of this laptop, you may want to consider carefully the wireless adapter choices offered by Lenovo. The Lenovo 11b/g/n wireless adapter (Realtek is the OEM) is not natively supported in CrunchBang at the current time, which required me to compile and install an appropriate driver from Realtek. This was not difficult as you’ll see in the steps below, however you may wish to consider purchasing the machine with the Intel Centrino-based adapter option instead. To the best of my knowledge, this adapter is natively supported in CrunchBang, as well as many other Linux distributions, including Ubuntu.
In addition, if you choose to purchase the laptop with the Nvidia graphics option, be aware that CrunchBang utilizes the in-kernel graphics driver Nouveau. This driver generally works well, however its performance in 3D-based games or desktop effects that require hardware graphics acceleration is limited. Nvidia makes available its proprietary driver, however the installation and configuration of this driver are beyond the scope of this post.
Installation
Among my goals when purchasing the T410 was to be able to dual-boot between Windows 7 and various Linux distributions and/or *BSD. The following steps describe how I reduced the size of the existing Windows 7 partition and re-partition the remaining unallocated disk space in order to install CrunchBang. The Window 7 Boot Configuration Data Editor (BCDEdit) was used to configure the Windows 7 bootloader to display a menu at boot time that allowed me to choose between Windows 7 and CrunchBang. If you’re not interested in preserving your existing Windows 7 install, or plan to install CrunchBang on a virtual machine using an application such as QEMU or VirtualBox then simply skip these steps and proceed with installing CrunchBang directly to the physical or virtual disk.
While I’ve never encountered a situation where the following steps destroyed existing disk data, you should make sure you backup any files you feel are critical before proceeding.
- Reducing the Windows 7 Partition
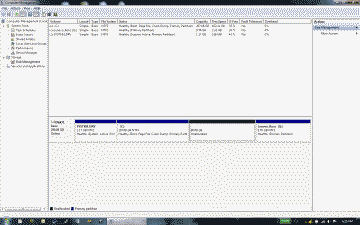
The first thing that I needed to do was reduce the size of the existing Windows 7 partition. I found Windows 7’s own Disk Management tool to be the most efficient method for accomplishing this task. The Disk Management tool can be accessed by using Win+r and entering diskmgmt.msc. I right-clicked on the Windows 7 partition (C:) and selected “Shrink Volume.” Then I entered the amount of space (in Megabytes) that the partition should shrink (which in turn becomes the amount of space available to install CrunchBang), then selected “Shrink” (See Figure 1). CrunchBang needs a minimum of approximately 5 Gigabytes (GB) of free disk space. I chose 80 GB (80000 MB), within which I will create a ~31 GB partition for CrunchBang, a ~1 GB partition for Linux swap, and a ~16 GB NTFS partition that I will use to share files between CrunchBang and Windows 7. The remaining space I will hold in reserve for additional logical partitions. I then exited out of the Disk Management tool and rebooted the system, eventually arriving at the Windows 7 logon screen. Along the way I saw Windows perform a disk check – that’s normal, and only occurred once as a result of this procedure.
- Partitioning for CrunchBang
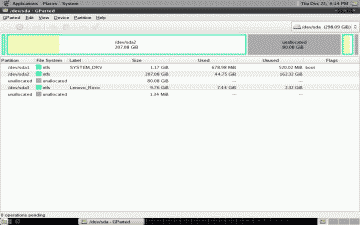
To partition the newly created free disk space, I booted the system from a USB-based flash memory drive containing a stable release of GParted Live. After accepting the default settings for keymap, language, and X-window configuration, I arrived at the GParted desktop (See Figure 2).
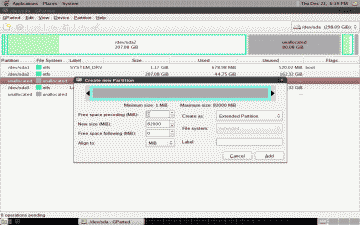
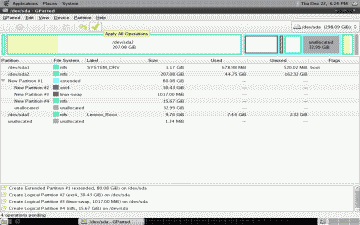
I could see the ~80 GB of free disk space that I created currently labeled as unallocated. The hard drive is limited to four primary partitions, so in this unallocated space I created a new extended partition by left-clicking on this space to highlight it, then selecting “New” to create a new partition. I made this partition an Extended Partition, then selected “Add” (See Figure 3).
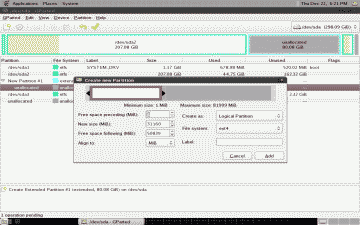
Once the new extended partition was created, I left-clicked on its unallocated space to highlight it and then selected “New” to create a new partition. I made this partition a Logical Partition and the file system ext4. I reduced the size of this partition to ~31 GB by moving the slider to the left until I reached the desired size (alternatively you can do this by typing in the value in the New Size field) then selected “Add” (See Figure 4).
In the remaining unallocated space, I created two additional logical partitions following the steps above. One was a linux-swap file system and sized to ~1 GB, the second was a NTFS file system consuming ~16GB. I reserved the remaining space unallocated for future use. When completed, I had a partition layout that resembled Figure 5.
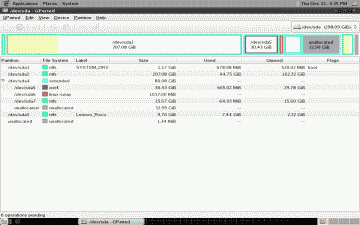
After review the newly created partition layout, I selected “Apply All Operations” and GParted proceeded with writing the changes to the disk. After a few minutes I could see the re-partitioned drive (See Figure 6).
GParted retained the device designations /dev/sda1, /dev/sda2, and /dev/sda4 for Windows 7 but had now also assigned the appropriate device designations to my newly minted extended and logical partitions:
/dev/sda3 – (Extended partition)
/dev/sda5 – ext4 (Logical partition)
/dev/sda6 – Linux-Swap (Logical partition)
/dev/sda7 – NTFS (Logical partition)
I exited out of GParted and reboot the system, confirming that I could see the 16 GB NTFS partition that I had created (designated as drive letter E) in Windows 7.
- Installing CrunchBang
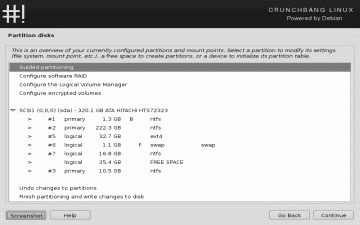
I downloaded the 64-bit BPO version of CrunchBang and burned it to a CD, then booted the system using this disk. I chose the “Graphical Install” option and continued through the installation process until I arrived at “Partition disks” where I selected “Manual” to advance to an overview of my existing partitions and mount points (See Figure 7). This is where I instructed CrunchBang which mount points and file systems to use on the partitions I had created.
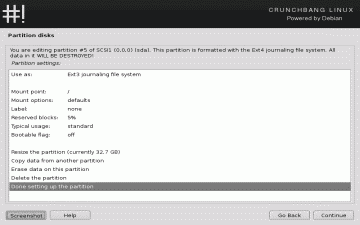
I selected partition #5 and “Use as:” in the subsequent screen, where I was presented with several file system options. I selected the “Ext4 journaling file system” and chose to format the partition. Then I set its mount point to / since partition #5 will serve as the root partition for CrunchBang. When completed, I selected “Done setting up the partition,” which returned me to screen showing an overview of my partitions and mount points (See Figure 8).
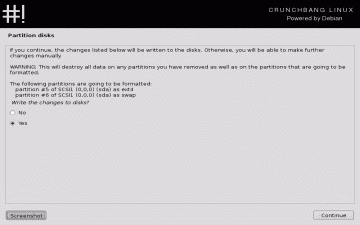
Following similar steps, I selected partition #6 and under “Use as:” selected “Swap area.” The mount was then automatically set and there was no need (or option) to format this partition. Partition #7, the NTFS partition, was left alone for the moment. I will add this partition to /etc/fstab in a later step so that CrunchBang will automatically mount it at boot time. After doing a final review, I selected “Finish partitioning and write changes to disk,” then confirmed my choices by selecting “Yes” in the subsequent screen prompting the installer to write the changes to the partitions (See Figure 9).
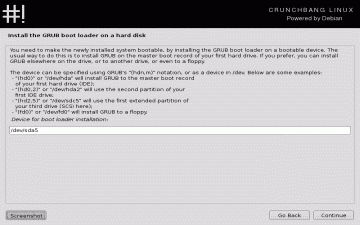
CrunchBang needs to be told where to install its bootloader GRUB. Because I will be using the Windows boot loader to boot both operating systems, I elected not to write over it by installing GRUB on the hard drive’s Master Boot Record. Instead, I chose to install GRUB on the partition that will contain the CrunchBang operating system – in my case partition #5 (/dev/sda5) (See Figure 10).
When the installation completed I was asked to reboot the system where I once again arrived at the Windows 7 logon screen.
- Configuring for Dual Boot
With the partitions created and CrunchBang installed, it was time to set up the system so that it could boot to Windows 7 or CrunchBang. This involves creating a .bin file containing the boot record of the CrunchBang partition, then copying that file to Windows 7. Window 7’s BCDEdit utility is then used to create a new entry in its BCD store that will point to this file. Windows 7 will then display a menu at boot time that will provides a choice between Windows 7 and CrunchBang.
I once again booted the system using the GParted disk, then opened a terminal and created a temporary mount point:
|
1 2 |
sudo su mkdir /mnt/tmp |
Then mounted the device representing the 16GB NTFS partition to this mount point:
|
1 |
mount -t ntfs-3g /dev/sda7 /mnt/tmp |
Using the venerable dd command, I wrote the first 512 bytes of the CrunchBang partition to a .bin file and copied that file to the NTFS partition:
|
1 |
dd if=/dev/sda5 of=/mnt/tmp/crunch.bin bs=512 count=1 |
I exited GParted and reboot to Windows 7. I navigated to the NTFS partition (E:) where I found the crunch.bin file, and moved that file to the root of the my Windows 7 partition (C:). Next I used BCDEdit to add an entry to Windows 7’s BCD store. Administrative privileges are required to use BCDEdit, so I navigated to Start->All Programs->Accessories, right-clicked on Command Prompt and selected “Run as administrator.” Alternatively you can open the run box using Win+r, enter cmd and then use Ctrl+Shift+Enter. First, I created an menu entry for CrunchBang:
|
1 |
bcdedit /create /d “CrunchBang” /application bootsector |
BCDEdit will return an alphanumeric identifier for this entry that I will refer to as {ID} in the remaining steps. You’ll need to replace {ID} by the actual returned identifier. An example of {ID} is {d7294d4e-9837-11de-99ac-f3f3a79e3e93}. Next I specified which windows partition hosts a copy of the crunch.bin file:
|
1 |
bcdedit /set {ID} device partition=c: |
The path to the crunch.bin file:
|
1 |
bcdedit /set {ID} path \crunch.bin |
An entry to the displayed menu at boot time:
|
1 |
bcdedit /displayorder {ID} /addlast |
How long Windows 7 should display the menu:
|
1 |
bcdedit /timeout 30 |
That’s it. I rebooted and was presented with a menu where I could choose to boot to Windows 7 or CrunchBang. When I choose CrunchBang, I’m taken to the GRUB menu where I can continue booting to CrunchBang.
By the way, if at any time you want to eliminate the CrunchBang menu option, simply delete the BCD store entry you created using the following command:
|
1 |
bcdedit /delete {ID} |
Configuration
- Internet Connection
After booting to CrunchBang for the first time it was time to establish an Internet connection. Using the T410’s Ethernet port presented no problems, however its 11b/g/n wireless adapter, based on the Realtek 8192SE chipset, is not currently supported by CrunchBang. So, before I could establish a wireless connection, I needed to download and install the appropriate Linux header files, then download, compile and install the Realtek 8192SE Linux wireless driver:
|
1 |
apt-get install linux-headers-$(uname -r) |
I navigated to the directory where I had downloaded and extracted the Realtek driver file, then changed into the resulting directory to compile and install it:
|
1 2 3 4 5 |
tar -zxvf 92ce_se_de_linux_mac80211_0004.0816.2011.tar cd rtl_92ce_92se_92de_linux_mac80211_0004.0816.2011 sudo su make make install |
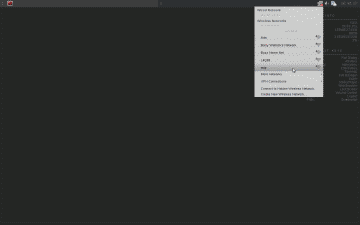
After the Realtek driver was installed I reboot the system. To establish a wireless connection, I simply left-clicked on the Network Manager applet icon and selecting my access point. I entered my “WPA and WPA2 Personal” passphrase and was connected to the Internet within a few seconds (See Figure 11).
- Run the Post-install Script
With an Internet connection established, I decided to run CrunchBang’s optional post-installation script cb-welcome, designed to help with the initial configuration of a new CrunchBang installation. The script presented me with a series of options that allowed me to update the system’s software package repositories and installed packages, add printer and Java support, and install LibreOffice.
|
1 |
cb-welcome |
- Install and Configure the Pantech UML290 Modem
I own a Pantech UML290, Verizon’s 4G LTE USB Modem. To configure it to work under CrunchBang, I plugged the device in to a USB port, waited for a few moments until the device’s LED began flashing blue, indicating it had found the Verizon network, then left-clicked on the Network Manager applet icon on the bottom desktop panel and selected “New Mobile Broadband (GSM) connection.” I proceeded through the connection wizard until I arrived the “Choose your Provider” screen. Since Verizon was not among the choices on the list, I selected “I can’t find my provider and wish to enter it manually” where I entered the term Verizon in the “provider” field. In the subsequent “Choose your billing plan” screen, I entered the term vzwinternet in the “Selected plan APN (Access Point Name)” field. I then proceeded to the connection wizard’s remaining screen and selected “apply.” I removed the Pantech UML290, rebooted the laptop, plugged it back in and waited for LED to flash blue. Then I left-clicked on the Network Manager applet icon and selected “Verizon connection”, and after a few moments was connected to Verizon’s 4G LTE network.
- Configure the Bash Shell
I spend a lot of time at the terminal when using Linux so I configured BASH (“Bourne Again Shell”), CrunchBang’s default shell, so that it contained my favorite aliases and other tweaks. When you start a terminal session in CrunchBang, Bash will read commands from ~/.bashrc. You can add your own command aliases and other changes directly to ~/.bashrc, or simply uncomment and modify some or all of the ones that are provided as examples in that file if desired. The approach that I prefer, however, is to create a separate file containing these modifications, then simply point to that file from within ~/.bashrc. This approach allows me to easily port these changes from one system to another:
|
1 |
touch ~/.bash_aliases |
Then I added my aliases and other tweaks to this file. Here’s an example of my ~/.bash_aliases file:
|
1 2 3 4 5 6 7 8 9 10 11 12 13 14 15 16 17 18 19 20 21 22 23 24 |
# This file defines my Bash shell aliases and other tweaks # This file is linked from ~/.bashrc # Custom terminal prompt # Show name@host followed by the current directory PS1="[\u@\h: \w]$ " # My Bash aliases alias ls='ls --color=auto' alias lsa='ls -a --color=auto' alias lsl='ls -a -l --color=auto' alias lsi='ls -a -i --color=auto' alias lsr='ls -R --color=auto' alias ps='ps -aef' alias winshare='sudo mount -t cifs -o username=iceflatline,dir_mode=0755,file_mode=0644,uid=1000,gid=1000 //192.168.10.100/share /media/winhost' # Set the Terminator titlebar to reflect user@host:dir case "$TERM" in xterm*|rxvt*) PROMPT_COMMAND='echo -ne "\033]0;${USER}@${HOSTNAME}: ${PWD/$HOME/~}\007"' ;; *) ;; esac |
Next, I opened ~/.bashrc and uncommented the following lines:
|
1 2 3 |
if [ -f ~/.bash_aliases ]; then . ~/.bash_aliases fi |
Then I restarted Bash in order for these changes to take effect:
|
1 |
exec bash |
- Configure Terminator
The default terminal emulator in CrunchBang is Terminator, one of my favorites, second only perhaps to Terminal, Xubuntu’s default lightweight terminal emulator.
What Terminator displays in its titlebar is dependent on the environment variable PROMPT_COMMAND. If this variable is not set, the titlebar will display “None” on it’s titlebar. To configure this so it displays the user name and the current directory, I added the following lines to my ~/.bash_aliases file:
|
1 2 3 4 5 6 7 |
case "$TERM" in xterm*|rxvt*) PROMPT_COMMAND='echo -ne "\033]0;${USER}@${HOSTNAME}: ${PWD/$HOME/~}\007"' ;; *) ;; esac |
To enable window transparency in Terminator I made the cairo composite manager run full time by uncommenting the line (sleep 10s && cb-compmgr –cairo-compmgr) & in ~/.config/openbox/autostart.sh. A fixed transparency setting can be set by right-clicking in the Terminator window and selecting Preferences->Profiles->Background and selecting “Transparent background,” then adjusting the slider to the desired transparency. However I wanted the ability to adjust the level of window transparency using a mouse scroll wheel. To enable this capability I opened ~/.config/openbox/rc.xml and added the following lines in the context name=”Titlebar” area under the mouse section:
|
1 2 3 4 5 6 7 8 9 10 11 12 13 |
<!--ICEFLATLINE START --> <!-- Mouse controls for window transparency --> <mousebind button="C-Up" action="Click"> <action name="Execute"> <execute>transset-df -p --inc 0.2</execute> </action> </mousebind> <mousebind button="C-Down" action="Click"> <action name="Execute"> <execute>transset-df -p --min 0.2 --dec 0.2</execute> </action> </mousebind> <!--ICEFLATLINE END --> |
Then I restarted Openbox in order for these changes to take effect:
|
1 |
openbox --restart |
Now I can place the mouse pointer on the Terminator titlebar and adjust the window transparency using CTRL + mousewheel. Note that now if you select “Transparent backgound” under Preferences->Profiles->Background, the slider bar determines the minimum transparency achieved using the mouse scroll wheel.
- Partition Mounting and Permissions
To ensure that CrunchBang mounts my Windows 7 and NTFS partition at boot time with the correct directory and file permissions, I created two mount points in /media:
|
1 |
sudo mkdir -p /media/windows /media/share |
Then added the following lines to /etc/fstab:
|
1 2 3 |
/dev/sda2 /media/windows ntfs-3g user,defaults,dmask=022,fmask=133,uid=1000,gid=1000 0 0 /dev/sda7 /media/share ntfs-3g user,defaults,dmask=022,fmask=133,uid=1000,gid=1000 0 0 |
- Access Windows Shares
Unfortunately, CrunchBang’s Thunar file manager is unable to discover Windows hosts on a network and then automatically mount/unmount their shared folders. Consequently, in order to access a shared folder, one can either use Gigolo, a small utility included with CrunchBang that acts as a frontend to manage connections to local and remote filesystems using GIO/GVfs, or manually mount the remote shares yourself. I chose the latter. First I installed smbfs, a CIFS compatibility package that adds support for the old SMB/CIFS filesystem types smbmount, smbumount, and mount.smbfs:
|
1 |
sudo apt-get install smbfs |
Created a mount point in /media:
|
1 |
sudo mkdir /media/winshare |
Then mounted the Windows share on this mount point with the correct directory and file permissions using the IP address of the Windows host, the name of the shared folder, and Windows user name:
|
1 |
sudo mount -t cifs -o username=iceflatline,dir_mode=0755,file_mode=0644,uid=1000,gid=1000 //192.168.10.100/share /media/winshare |
To cut down on the amount of typing required each time I needed to mount this share, I added the following command alias in my ~/.bash_aliases file:
|
1 |
alias winshare='sudo mount -t cifs -o username=iceflatline,dir_mode=0755,file_mode=0644,uid=1000,gid=1000 //192.168.10.100/share /media/winshare' |
Note: A similar mount command can be added to /etc/fstab if there is a desire to have the shared folder mounted automatically when CrunchBang starts.
- Enable the Volume, Mute and Microphone Controls
Unfortunately, the audio volume, audio mute, and microphone mute buttons on the T410’s keyboard were not recognized by CrunchBang. To fix that I opened ~/.config/openbox/rc.xml and added the following lines in the keyboard section:
|
1 2 3 4 5 6 7 8 9 10 11 12 13 14 15 16 17 18 19 20 21 22 23 24 25 26 27 28 29 30 31 32 33 |
<!-- ICEFLATLINE START--> <!-- t410 volume, mute and mic keyboard bindings --> <keybind key="XF86AudioRaiseVolume"> <action name="Execute"> <command>amixer -q set Master,0 5+</command> </action> </keybind> <keybind key="XF86AudioLowerVolume"> <action name="Execute"> <command>amixer -q set Master,0 5-</command> </action> </keybind> <keybind key="XF86AudioMute"> <action name="Execute"> <command>amixer -q set Master,0 toggle</command> </action> </keybind> <keybind key="C-0xF8"> <action name="Execute"> <command>amixer -q set Mic 1,0 80% unmute</command> </action> </keybind> <keybind key="0xF8"> <action name="Execute"> <command>amixer -q set Mic 1,0 mute</command> </action> </keybind> <!-- ICEFLATLINE END --> |
Getting the microphone mute button to function properly required a small work-around because, unlike the audio mute control (XF86AudioMute), the system does not support the toggle behavior for this key – in other words, the ability to push the button once to mute the microphone, then once again to unmute it. The work-around was to introduce a second key to the setup so that I could mute the microphone using the microphone mute button, then unmute it and set the microphone level to 80% by holding CTRL key and pushing the microphone mute button. Ugly I know, but it works.
- Increase The Maximum Audio level
After setting up the volume controls, I noticed that the maximum audio loudness level in CrunchBang was substantially lower when compared to Windows 7. To correct this problem I right-clicked the volume icon in the panel/taskbar, selected “Preferences” and changed value of “Volume adjustment” to 100. Then I opened the file /etc/modprobe.d/alsa-base.conf and added the following line at the end of the file, then rebooted the system:
|
1 |
options snd-hda-intel model=thinkpad |
- Install and Configure Iceweasel
Iceweasel is the default web browser in CrunchBang. Iceweasel is a fork from Firefox with the following purpose: backporting of security fixes to declared Debian stable version; no inclusion of trademarked Mozilla artwork. Beyond that it is functionally the same as Firefox, and as such, can be configured in the same way.
- Make the backspace key work
Oddly, the backspace key in Iceweasel does not cause the browser to go back to the previous page as it does in under Windows. To fix that I entered about:config in the address bar, entered browser.backspace_action in the Filter field, double-clicked on its value and changed it from 2 to 0, then restarted Iceweasel.
- Force last tab to close
The default behavior in Iceweasel prevents the user from closing the last open tab without also closing the browser. To enable the ability to close the last tab but not the entire browser, I opened about:config, entered browser.tabs.closeWindowWithLastTab in the Filter field, double-clicked on its value and changed it from “true” to “false,” then restarted Iceweasel.
- Avoid the Favicons
Favicons are those small icons made available by web sites that are displayed in front of their respective bookmark and tab in Iceweasel. To save on some disk space and speed up browsing, I prevented Iceweasel from loading these icons. To do this I opened about:config and modified the following parameters:
browser.chrome.favicons set to “false”
browser.chrome.image_icons.max_size set to 0
browser.chrome.site_icon set to “false”
- Eliminate the new tab button
Iceweasel features a small green “+” symbol adjacent to the tab(s) that provides the user with the ability to open a new tab by clicking on it. This is a feature I don’t use, preferring instead to open new tabs using Ctrl+t. To eliminate this feature, as well as some others I don’t use, I created the file ~/.mozilla/firefox/1jp2ynoh.default/chrome/userChrome.css. Note: your default firefox profile directory will be different than the 1jp2ynoh.default directory shown in following example:
|
1 |
touch ~/.mozilla/firefox/1jp2ynoh.default/chrome/userChrome.css |
Then opened this file and added the following lines:
|
1 2 3 4 5 6 7 8 9 10 11 12 13 14 15 16 17 18 19 20 21 |
/* * START ICEFLATLINE */ /* Remove the Bookmark star (FF v3.x and 4.x) */ #star-button { display: none !important; } /* Remove the go button from the status bar (FF v3.x and 4.x) */ #go-button { display: none !important; } /* Remove the new tab button (FF v3.x and 4.x)*/ .tabs-newtab-button {display: none;} /*hide the firefox button (FF v4.x)*/ #appmenu-button, #appmenu-toolbar-button {display:none} /* * END ICEFLATLINE */ |
Then I restarted Iceweasel in order for these changes to take affect.
Look and Feel
- Modify the GRUB Bootloader Menu
By default, the GRUB menu displays at a resolution of 640*480. Hoping to improve on that I installed and ran hwinfo, a tool to help determine which resolutions the T410’s Nvidia GPU could support:
|
1 2 |
sudo apt-get install hwinfo sudo hwinfo --framebuffer |
The following sample output from the preceding command suggested a number of resolutions that could be supported. Through some trial and error, I settled on 1024*768:
|
1 2 3 4 5 6 7 8 9 10 11 12 13 14 15 16 17 18 19 20 21 22 23 24 25 26 27 28 29 30 31 32 33 34 35 36 37 38 39 40 41 42 43 44 |
02: None 00.0: 11001 VESA Framebuffer [Created at bios.464] Unique ID: rdCR.NszzKie+Nl9 Hardware Class: framebuffer Model: "NVIDIA Quadro NVS170M" Vendor: "NVIDIA Corporation" Device: "NVIDIA Quadro NVS170M" SubVendor: "NVIDIA" SubDevice: Revision: "Chip Rev" Memory Size: 14 MB Memory Range: 0xcf000000-0xcfdfffff (rw) Mode 0x0300: 640x400 (+640), 8 bits Mode 0x0301: 640x480 (+640), 8 bits Mode 0x0303: 800x600 (+800), 8 bits Mode 0x0305: 1024x768 (+1024), 8 bits Mode 0x0307: 1280x1024 (+1280), 8 bits Mode 0x030e: 320x200 (+640), 16 bits Mode 0x030f: 320x200 (+1280), 24 bits Mode 0x0311: 640x480 (+1280), 16 bits Mode 0x0312: 640x480 (+2560), 24 bits Mode 0x0314: 800x600 (+1600), 16 bits Mode 0x0315: 800x600 (+3200), 24 bits Mode 0x0317: 1024x768 (+2048), 16 bits Mode 0x0318: 1024x768 (+4096), 24 bits Mode 0x031a: 1280x1024 (+2560), 16 bits Mode 0x031b: 1280x1024 (+5120), 24 bits Mode 0x0330: 320x200 (+320), 8 bits Mode 0x0331: 320x400 (+320), 8 bits Mode 0x0332: 320x400 (+640), 16 bits Mode 0x0333: 320x400 (+1280), 24 bits Mode 0x0334: 320x240 (+320), 8 bits Mode 0x0335: 320x240 (+640), 16 bits Mode 0x0336: 320x240 (+1280), 24 bits Mode 0x033d: 640x400 (+1280), 16 bits Mode 0x033e: 640x400 (+2560), 24 bits Mode 0x0345: 1600x1200 (+1600), 8 bits Mode 0x0346: 1600x1200 (+3200), 16 bits Mode 0x034a: 1600x1200 (+6400), 24 bits Mode 0x0360: 1280x800 (+1280), 8 bits Mode 0x0361: 1280x800 (+5120), 24 bits Mode 0x0362: 768x480 (+768), 8 bits Mode 0x0363: 848x480 (+3392), 24 bits Config Status: cfg=new, avail=yes, need=no, active=unknown |
I opened /etc/default/grub and uncommented and modified the following line:
|
1 |
GRUB_GFXMODE=1024x768 |
While I had this file opened, I also changed the value of GRUB_TIMEOUT to 180 so that the GRUB menu would stay onscreen for 3 minutes rather than the default 5 seconds.
In addition to the issue of resolution and menu duration, the GRUB bootloader menu contained the entry “Windows Recovery Environment,” an entry that I considered superfluous. To eliminate it, I opened /etc/grub.d/30_os-prober and added the following highlighted lines after the section of code that starts around line 92:
[text firstline=”92″ highlight=”102,103,104,105,106,107″][/text]
for OS in ${OSPROBED} ; do
DEVICE=”echo ${OS} | cut -d ':' -f 1”
LONGNAME=”echo ${OS} | cut -d ':' -f 2 | tr '^' ' '”
LABEL=”echo ${OS} | cut -d ':' -f 3 | tr '^' ' '”
BOOT=”echo ${OS} | cut -d ':' -f 4”
if [ -z “${LONGNAME}” ] ; then
LONGNAME=”${LABEL}”
fi
# Added to remove the Windows Recovery entry
if [ “$LONGNAME” = “Windows Recovery Environment (loader)” ] && [ “${DEVICE}” = “/dev/sda1” ] ; then
continue
fi
Then I updated GRUB in order for these changes to take effect:
|
1 |
sudo update-grub2 |
- Stop the Clipboard Manager from Launching
I don’t use the Clipboard Manager so there was no need for this to launch at system boot. To stop it I opened ~./config/openbox/autostart.sh and commented out the following line:
|
1 |
(sleep 3s && parcellite) & |
- Move the Panel/Taskbar
By default CrunchBang places its panel/taskbar at the top of the screen. Relocating it to the bottom of the screen was accomplished by opening the file ~/.config/tint2/tint2rc and changing the line Top center horizontal to Bottom center horizontal in the #panel section, then restarting Tint2:
|
1 |
sudo tint2restart |
- Configure Conky
One of my favorite things about using CrunchBang is its inclusion of Conky, a light-weight free and open source system monitor that can display nearly any information about my system. Using sets of variables in Conky’s configuration file I can define what Conky should monitor and where those monitored parameters are displayed on the desktop. The look and feel of how this information is displayed is also highly customizable.
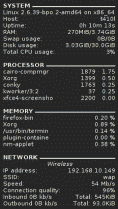
Conky’s default configuration file ~/.conkyrc can be used as a starting point. When configuring Conky for my system I decided to dispense with fancy network graphs and other eye candy and go with a more minimalistic approach instead. I settled on four areas for Conky to monitor, which provide just the information I need while not burdening system resources.
System – Basic system information showing kernel version, uptime, total RAM and Swap usage, etc.
Processor – Shows the top five applications or processes based on CPU usage.
Memory – Shows the top five applications or process based on system RAM usage.
Network – Shows basic information regarding wired and wireless connections, including IP address, inbound and outbound speed, connection quality, etc.
Conky includes support for the use of conditional statements within its configuration file. The ${if_up} variable, for example, checks for the existence of an interface passed to it as an argument. If that interface exists and is up, Conky will display everything between ${if_up} and the matching ${endif}. I used this particular variable to my advantage when configuring the network monitoring section. Instead of displaying information about all my wired and wireless interfaces, even when they were not active, I chose instead to have Conky display information about them only if they were being used. Here’s the configuration file I’m currently using. Feel free use it as is or change it to fit your needs.
|
1 2 3 4 5 6 7 8 9 10 11 12 13 14 15 16 17 18 19 20 21 22 23 24 25 26 27 28 29 30 31 32 33 34 35 36 37 38 39 40 41 42 43 44 45 46 47 48 49 50 51 52 53 54 55 56 57 58 59 60 61 62 63 64 65 66 67 68 69 70 71 72 73 74 75 76 77 78 79 80 81 82 83 84 85 86 87 88 89 90 91 92 93 94 95 96 97 98 99 100 101 102 103 104 105 106 107 108 109 110 111 112 113 114 115 116 117 118 119 120 121 122 123 124 125 126 127 128 129 130 131 132 133 134 135 136 137 138 |
#### Conky Configuration File ### START OF CONFIG ## Conky Display Settings # Set to yes if you want Conky to be forked in the background background yes # Font use_xft yes xftfont Sans:size=8 xftalpha 1 # Update interval in seconds update_interval 1.0 # This is the number of times Conky will update before quitting # Set to zero to run forever. total_run_times 0 # Create own window instead of using desktop (required in nautilus) own_window yes # Use pseudo transparency with own_window? own_window_transparent yes # If own_window is yes, you may use type normal, desktop or override own_window_type normal # If own_window is yes, these window manager hints may be used own_window_hints undecorated,below,sticky,skip_taskbar,skip_pager # Use double buffering (reduces flicker-maybe) double_buffer yes # Minimum size of text area minimum_size 210 200 # Maximum width of text area maximum_width 240 # Draw shades? draw_shades yes # Draw outlines? draw_outline no # Draw borders around text? draw_borders no # Draw borders around graphs? draw_graph_borders no # Default colors and also border colors default_color white default_shade_color black default_outline_color white # Text alignment, other possible values are commented #alignment top_left alignment top_right #alignment bottom_left #alignment bottom_right #alignment none # Gap between borders of screen and text # same thing as passing -x at command line #(in pixels-me thinks) gap_x 12 gap_y 12 # Subtract file system buffers from used memory? no_buffers yes # Should all text to be in uppercase? uppercase no # number of cpu samples to average # set to 1 to disable averaging cpu_avg_samples 2 # Force UTF8? note that UTF8 support required XFT override_utf8_locale no # Buffer size text_buffer_size 512 # Use an assigned IP addy to determine network adaptor is up if_up_strictness address ## Conky Output TEXT ${color FFFFF0} ${font sans-serif:bold:size=8}SYSTEM ${hr 2} ${font sans-serif:normal:size=8}$sysname $kernel on $machine Host:$alignr$nodename Uptime:$alignr$uptime RAM:$alignr$mem/$memmax Swap usage:$alignr$swap/$swapmax Disk usage:$alignr${fs_used /}/${fs_size /} Total CPU usage:$alignr${cpu cpu0}% ${font sans-serif:bold:size=8}PROCESSOR ${hr 2} ${font sans-serif:normal:size=8}${top name 1} $alignr ${top pid 1} ${top cpu 1} ${top name 2} $alignr ${top pid 2} ${top cpu 2} ${top name 3} $alignr ${top pid 3} ${top cpu 3} ${top name 4} $alignr ${top pid 4} ${top cpu 4} ${top name 5} $alignr ${top pid 5} ${top cpu 5} ${font sans-serif:bold:size=8}MEMORY ${hr 2} ${font sans-serif:normal:size=8}${top_mem name 1}${alignr}${top mem 1} % ${top_mem name 2}${alignr}${top mem 2} % $font${top_mem name 3}${alignr}${top mem 3} % $font${top_mem name 4}${alignr}${top mem 4} % $font${top_mem name 5}${alignr}${top mem 5} % ${font sans-serif:bold:size=8}NETWORK ${hr 2} ${if_up wlan0} ${font sans-serif:italic:size=8} $alignc Wireless ${font sans-serif:normal:size=8}IP address: $alignr ${addr wlan0} SSID: $alignr ${wireless_essid wlan0} Speed: $alignr ${wireless_bitrate wlan0} Connection quality: $alignr ${wireless_link_qual_perc wlan0}% Inbound ${downspeed wlan0} kb/s $alignr Total: ${totaldown wlan0} Outbound ${upspeed wlan0} kb/s $alignr Total: ${totalup wlan0} ${endif} ${if_up eth0} ${font sans-serif:italic:size=8} $alignc Wired ${font sans-serif:normal:size=8}IP address: $alignr ${addr eth0} Inbound ${downspeed eth0} kb/s $alignr Total: ${totaldown eth0} Outbound ${upspeed eth0} kb/s $alignr Total: ${totalup eth0} ${endif} ${if_up ppp0} ${font sans-serif:italic:size=8} $alignc Mobile ${font sans-serif:normal:size=8}IP address: $alignr ${addr ppp0} Inbound ${downspeed ppp0} kb/s $alignr Total: ${totaldown ppp0} Outbound ${upspeed ppp0} kb/s $alignr Total: ${totalup ppp0} ${endif} ### END OF CONFIG |
In order for Conky to recognize any changes you’ve made you’ll need to reboot the system or use the following command:
|
1 |
conkywonky |
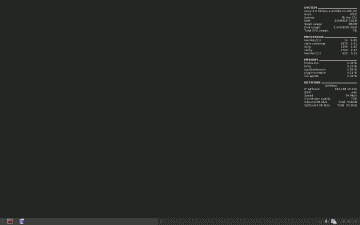
Here’s what this Conky configuration looks like running on my CrunchBang desktop:
Finishing Steps
At this point the installation and basic configuration of CrunchBang on my Lenovo T410 was complete. All that was left for me to do was to download and install/uninstall some applications, stop a few applications and processes from starting automatically, and organize the Openbox menu.
CrunchBang includes a nice set of default applications, however, there were a few not included that I could not do without, including:
ethtool – A utility for controlling network drivers and hardware
Filezilla – An FTP client.
Geeqie – A graphics file browser.
Hamachi – A hosted VPN service now known as “LogMeIn.”
htop – An interactive process viewer for Linux.
locate – A utility that scans one or more databases of filenames and displays any matches.
ntpdate – A client for setting system time from NTP servers.
Notepad++ – A text editor (run under wine).
OpenVPN – A VPN software and server application.
Pidgin – An instant messenger client
sysv-rc-conf – A utility to examine run-level services.
Truecrypt – Disk encryption software
tsclient – A program for remotely accessing and viewing Windows desktops.
Wine – Windows emulator.
All of these were applications were available through the package manager. I also took the opportunity to uninstall some of the default applications that I knew I wouldn’t use. Abiword, Catfish, GIMP, gFTP, Gnumeric, and Viewnior fell into this category.
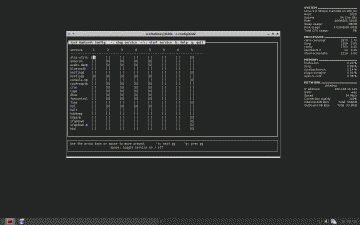
After installing/uninstalling applications, I fired up sysv-rc-conf to examine run-level services:
|
1 |
sudo sysv-rc-conf |
The default layout displays a grid of all services that have symlinks in /etc/init.d/ and which run-levels they are activated in (See Figure 14). For example, where the cups row and column 2 intersect, if there is an “X” there that means the service will be turned on when entering run-level 2 (run-level 2 through 5 are full multi-user modes and are equivalent in CrunchBang). If there is no X it can mean that either there are no links to the service in that specific run-level, or that the service is turned off when entering that run-level. If more configuration detail is needed, sysv-rc-conf can be started using the priority option.
|
1 |
sudo sysv-rc-conf -p |
The priority layout also uses a grid, but instead of X’s there are text boxes that can have different values. If the text box starts with the letter S the service will be started when entering that runlevel. The two digits following is the order in which the services are started. If the text box starts with the letter K the service will be stopped when entering that runlevel. If the text box is blank that means there isn’t a symlink in that run-level for that service and it will not be started or stopped.
Using the sysv-rc-conf default layout I toggled the bluetooth, hddtemp, openvpn, rc.local, rsync, and ntp services off.
With those tasks out of the way it was time to clean up and organize the Openbox menu. The Openbox menu is very flexible, displaying virtually anything, but it does have the downside of not automatically updating to show newly installed applications, these need to be added manually.
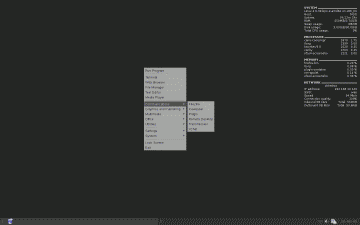
There are two ways of editing the Openbox menu, a GUI tool called obmenu, or editing the menu file directly. obmenu can be accessed by right-clicking anywhere on the desktop (alternatively you can use Win+Spacebar) and selecting Settings–>Openbox Config–>GUI Menu Editor. Using obmenu is pretty self explanatory, to edit an entry select it and edit the various fields at the bottom, or to add an entry select “New menu” or “New item” from the top. You can also move an entry to another location by selecting “Edit” and either “Move up” or “Move down.” To edit the menu file directly open ~/.config/openbox/menu.xml. The menu.xml file can also be accessed from the Openbox menu by selecting Settings–>Openbox Config–>Edit menu.xml. I setup my Openbox menu so that I had quick access to Terminator, Firefox, Thunar, Gedit, and VLC via the menu labels Terminal, Web Browser, File Manager, Text Editor, and Media Player respectively, and access to all other applications through six top-level menu categories: Communications, Graphics, Multimedia, Office, and Utilities (see Figure 15). I retained CrunchBang’s default settings for everything else in the Openbox menu.
Once my changes were complete I restarted Openbox so that they would take effect:
|
1 |
openbox --restart |
Conclusion
This concludes the post on how I installed and configured CrunchBang Linux 10 “Statler” R20111125 on my Lenovo T410 laptop. Many of the choices made throughout the installation and configuration steps that I’ve described were of course based on my personal preference. You are encouraged to make your own choices. I suspect that any challenges you encounter along the way can easily be overcome. In short, CrunchBang works well on this laptop.
References
https://iceflatline.com/2009/09/how-to-dual-boot-windows-7-and-linux-using-bcdedit
http://technet.microsoft.com/en-us/library/cc709667%28WS.10%29.aspx
Newham, C., and Bill Rosenblatt. Learning the bash Shell. 2nd ed. Sebastopol, CA, USA: O’Reilly, 1998. Print.
https://iceflatline.com/2009/10/configure-command-line-aliases-in-bash
https://answers.launchpad.net/terminator/+faqs
http://linux.die.net/man/8/mount.cifs
http://techpatterns.com/forums/about1435.html
http://ubuntuforums.org/showthread.php?t=1287602
https://iceflatline.com/2009/12/my-conky-configuration
WoW, that’s an awesome tuto, thanks for your work , did you put a link in the crunchbanglinux website ?
arpinux, thanks much for the comment. I have not placed a link at the CrunchBang site. Feel free to do so if you’d like.
linked at #! forums
Thanks vicshrike!
Why should GRUB not be installed to the MBR for dual boot?
vicshrike, you absolutely can. It’s really just a matter of personal preference.
what about the CB-welcome script? Did you run it? What do you think about it?
Thanks for the fast reply.
vicshrike, so much for the fast reply. My apologies. The script you refer to did run but I did not complete it, electing instead to setup the system as described in the post.
My previous use for #! was on lower resource hardware, so I just gotta ask if it is blazing fast on the i7? I thought about loading it on my i5, but I opted for a heavier distro that felt like it had more features. I know this is probably just in my head, so I might work on triple booting my laptop next week, as I was already wanting to add PC-BSD.
Does #! support virtualbox as the host OS? I use VBox a lot, so that might be another issue with me adopting #! as my primary distro.
Thanks for the tutorial, I don’t have that laptop, but it still gives me ideas on how to load mine.
sblaydes, yup, she’s pretty damn fast! I haven’t used vbox on #! but I see no reason why it wouldn’t run on Debian. Please post again if you try it and let me know how it worked.
[…] time running Conky on my desktop, and I really like it. The changes made in iceflatline’s install guide make Conky useful for me. I love having multiple virtualbox VMs running and seeing that I still […]
I don’t have a T410, but I do have an x201 and this guide works nearly identically for me. Same wireless card, same audio control buttons, etc.
The one issue I did have, though, was that when I selected Crunchbang from the Windows bootloader, I got a black screen with a blinking cursor instead of GRUB2. After some reading I found out that bcdedit doesn’t always play nicely with partitions that are not primary… and since our entire #! install is built inside of an Extended Partition, it didn’t like that.
My solution was to create an extra Primary Partition outside of our Extended Partition. I created a 100mb partition for the Linux \boot drive and installed GRUB2 there during the #! install. Worked like a champ for me after that.
Just thought I’d share my deviation and say thanks for the great guide!
joypunk, thanks for sharing your experiences. Much appreciated.
This= Amazingly Awesome.
But theres a problem. according to your tutorial, i just waisted 16Gigs of my limited memory :(
where you wrote, ill keep that for later use.. you should have had used it in the NTFS harddisk you made :(
now i cant do anything to that unallocated memory. i cant edit it. cant turn it into a separate drive.. NOTHING.. please tell me what to do about this.. i seriously don,t want to waste 16-20GB of my HD’s Memory.. Please.. :?
Ankit, I use the unallocated space for other Linux distributions. You may not have this requirement. Feel free to set aside the amount of unallocated space you require and parition it any way you’d like.
I can’t do anything to that extra unallocated space.
an extended partition can only be divided in 4 extra partitions anyway you like.
so that 20 GB i left is now just inaccesible. :(
i cant make a new partition to it.
i can’t even meerge it in an allready made partition.
nothing it just sits their on my drive.
the only way i see it is doing thee whole installation again…
which would be a hassle.. :/
BTW, how did you estimate that 1GB swap space is required??
if i am on a 2GB(ddr3) dual core machine.. with a 320Gigs HD..
is 1 GB swap space Ok for me..??
well you have 4GB RAM and you gave 1GB swap space .. so should i like reserve 512MB..??
Ankit, I’ve created additional logical partitions in my unallocated space. But again, the partition approach outlined in the post met my needs but may not not meet yours. Feel free to partition the disk anyway you would like.
Regarding the Linux swap space, that choice was almost completely arbitrary for me at the time I wrote the post. And, in fact, my swap is much smaller now and rarely gets used. How much you need will be very much depend on factors such as how much hard disk space you have; how much system memory you have; and, most importantly, what you plan on using your machine to do. I would suggest searching the web on the question to gain some further insight on the experiences of others and then decide on a size that will work for you.
Very helpful with configuration of my X220. Thanks!
Pete, thanks for the comment. That’s a fine laptop you have there. Enjoy!
What’s up to every , because I am really eager of reading this website’s post to be updated on a regular basis.
It carries nice information.
My blog: androx (Marcelino)
Great post. I was checking continuously this blog and I am impressed!
Extremely useful info specifically the last part :) I care for such info a lot.
I was looking for this particular info for a very long
time. Thank you and best of luck.
Here is my blog post – redunovin